How to Check Oil Contamination Before Damage
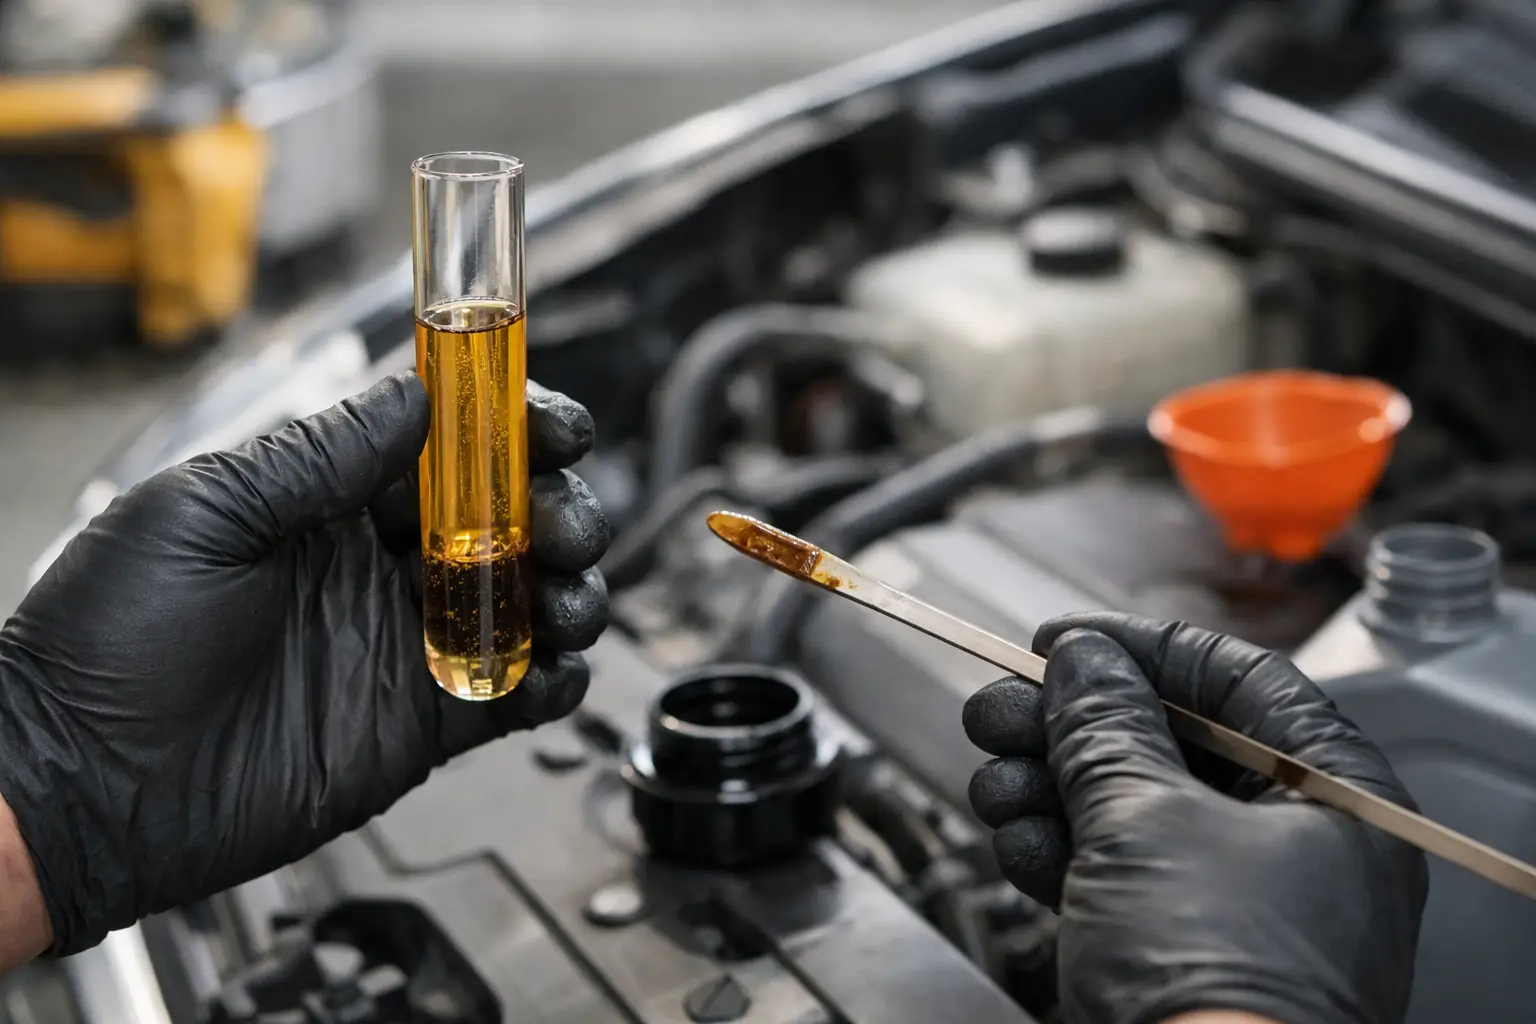
A diesel pickup that suddenly smells like fuel at the dipstick, a hydraulic reservoir with cloudy fluid, or an engine oil cap coated in tan sludge all point to the same maintenance question: how to check oil contamination before a minor fault becomes expensive wear or unexpected downtime.
Oil is designed to carry heat, suspend contaminants, and protect loaded parts. It cannot do that job indefinitely if fuel, coolant, water, dirt, or excessive wear metal enters the system. The fastest checks start with your senses and maintenance records, but the most dependable answer comes from a properly collected oil sample and laboratory analysis.
Start With the Oil’s Condition and Your Equipment’s Symptoms
Check oil only when the equipment is safely shut down and the manufacturer’s procedure allows it. For engines, that usually means parking on level ground and allowing the oil to drain back to the pan before checking the dipstick. Hydraulic, transmission, gear, and coolant systems may require a different temperature or fluid-level procedure, so follow the service manual.
Pull the dipstick or inspect the fluid at the fill opening under good light. Fresh oil darkens in normal service, particularly in diesel engines, so dark color alone is not proof of contamination. Instead, look for a change that does not fit the machine’s normal operating pattern.
Watch for an unexplained rise in oil level. Fuel dilution, coolant intrusion, or repeated short-trip operation can raise the level. A falling level combined with visible external leaks is a different problem, while a falling coolant level with a rising oil level deserves immediate attention.
Also pay attention to operating changes. Hard starting, increased oil consumption, loss of coolant, overheating, excessive crankcase pressure, a fuel smell, new valvetrain noise, or repeated filter plugging can provide the context that a quick visual inspection cannot.
How to Check Oil Contamination by Sight, Smell, and Feel
A field inspection will not identify every contaminant, but it can tell you whether to act now, monitor closely, or send a sample for analysis.
Look for water and coolant clues
Milky, creamy, or frothy oil can indicate water or coolant has mixed with the lubricant. The familiar beige deposit under an oil cap is often called “mayonnaise,” but do not diagnose a head gasket from that deposit alone. In cold climates and vehicles driven mostly on short trips, condensation may collect beneath the cap without a major internal failure.
The concern rises when the oil on the dipstick is consistently cloudy, the crankcase level rises, coolant level drops, or the engine runs hot. Coolant contamination is particularly destructive because glycol and coolant additives can damage bearing surfaces, create sludge, and reduce the oil’s ability to control corrosion.
Water contamination in hydraulic and gear oil may show up as haze or cloudiness rather than a thick emulsion. Free water can settle in low points and is not always visible on a dipstick. Equipment stored outdoors, operated through temperature swings, or washed aggressively is more exposed to moisture entry.
Smell for fuel dilution
Place a small amount of oil on a clean white shop towel and smell it carefully. A strong gasoline or diesel odor is a warning sign for fuel dilution. Fuel thins the oil, lowers viscosity, and can reduce the protective film separating bearings, rings, cam components, and turbocharger parts.
Common causes include leaking injectors, excessive idling, frequent regeneration events on diesel equipment, incomplete warm-up, carburetor or ignition issues, and repeated short-run operation. Do not rely on odor alone. Modern oils and fuel systems vary, and lab testing is the best way to quantify dilution.
Feel for grit, but do not treat it as a test
Rub a drop of oil between clean fingers only after the equipment is shut down and you have avoided hot surfaces. Grit or a distinctly abrasive feel can suggest dirt contamination, but very fine particles may not be detectable by touch. Never assume oil is clean simply because it feels smooth.
Dirt is one of the most damaging contaminants because it accelerates abrasive wear. Inspect the air filtration system, intake boots, crankcase breather, fill caps, reservoir vents, and service practices. On off-road equipment, agriculture machinery, and dusty jobsite vehicles, a compromised intake seal can create costly wear long before an operator notices a performance change.
Inspect the filter and drain pan
When changing oil, cut open the used filter with the proper tool and spread the media apart. A small amount of very fine metallic shimmer can occur during break-in, but flakes, chunks, heavy nonmagnetic debris, or an unusual amount of metal should not be ignored. Use a magnet to separate ferrous material from nonferrous material, then document what you find.
Check the drain pan too. Copper or bronze-colored particles may point to bearing or bushing wear. Silver material may come from aluminum components. Black rubber-like debris can indicate seal or hose deterioration. The source depends on the system, which is why a filter inspection should lead to diagnosis rather than guesswork.
Use Oil Analysis for a Defensible Answer
Visual checks are practical, but a used oil analysis provides the information needed to make confident maintenance decisions. A laboratory can measure viscosity, fuel dilution, water, glycol indicators, oxidation, soot, silicon, wear metals, and additive condition. It can also compare results over time to distinguish a one-time event from a developing failure.
For fleets, contractors, and shops, oil analysis is most useful as a trend program. Sampling once after a failure offers clues. Sampling at consistent intervals creates a baseline for each engine, hydraulic system, gearbox, or transmission and can identify abnormal wear before equipment is sidelined.
Take a representative sample. The best method is generally a live sample drawn from a designated sampling valve while the oil is warm and circulating. If that is not possible, draw from the middle of the drain stream during an oil change. Do not sample the first or final oil from the drain, and do not collect oil from the drain pan.
Use a clean sample bottle, label the equipment identification, fluid type, mileage or hours, oil time in service, makeup oil added, and any mechanical concerns. This information gives the lab enough context to interpret the report accurately. A high silicon reading means something different on a dusty excavator than it does on a highway truck.
Match the Response to the Contaminant
The right repair depends on what entered the oil and why. Changing contaminated oil without correcting the source only resets the clock on the next failure.
If water or coolant is confirmed, find the entry point before returning the equipment to normal service. Possible sources include head gaskets, oil coolers, injector sleeves, cracked castings, failed transmission coolers, reservoir breathers, and poor storage conditions. Severe coolant contamination may require flushing and inspection beyond a routine oil and filter change.
If fuel dilution is elevated, inspect the fuel system and operating pattern. Diesel fleets should review idling time, regeneration frequency, injector performance, and oil-change intervals. Gasoline engines may need diagnosis of injectors, ignition components, or repeated cold-operation issues. Select an oil with the correct viscosity and specifications, but do not use heavier oil as a substitute for fixing a fuel system fault.
If dirt or high silicon is the concern, inspect filtration and service discipline immediately. Replace damaged intake parts, verify filter fitment, check clamps and boots, and keep fill areas clean. For hydraulic systems, ensure reservoir breathers and fill equipment are properly filtered. Clean handling practices matter as much as the fluid in the container.
When wear metals are high, avoid making a major repair decision from one number alone unless the report is severe or debris is visible. Compare prior samples, inspect filters, verify oil grade and interval, and consider the machine’s workload. A sudden spike is more urgent than a stable reading that matches known break-in or operating conditions.
Build Contamination Checks Into Routine Maintenance
A practical program does not need to slow down a shop or fleet. Add a dipstick and fluid-level check to pre-trip inspections. During every service, record fluid condition, oil level, coolant level, filter observations, and any unusual odor. For critical assets, schedule oil analysis by hours, mileage, fuel use, or seasonal workload instead of waiting for a warning light.
Use the correct high-quality lubricant and filter for the application, then protect them with clean storage and controlled dispensing. Keep bulk containers sealed, use dedicated transfer equipment, and avoid topping off from dirty funnels. The premium oil in an engine or hydraulic system can only perform as intended when contaminants are kept out.
Oil Jobber supports operators and businesses that need application-specific AMSOIL lubricants, filters, and maintenance products for demanding automotive, diesel, powersports, and equipment service. Choosing the right product is a strong first step. Consistent inspection and testing are what protect the investment after it goes into service.
When oil gives you an early warning, treat it as useful operating data, not a nuisance. A clean sample, a documented trend, and a prompt repair can protect far more than one oil change – they can protect the uptime your business depends on.